Stamped Concrete: A New Concept in Outdoor Flooring, in India

Anant Shekhar Sahay, Vice-president Business, Development-South East Asia
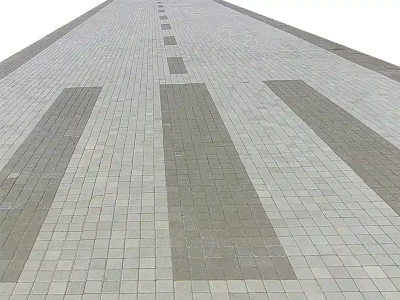
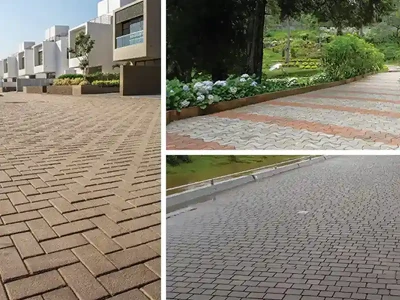
Stamped concrete is one of those home remodeling trends that seem to be catching up very fast these days to beautify outdoor floorings of residence or surrounding such as pool decks, driveways, entries, courtyards, patios, and so on.
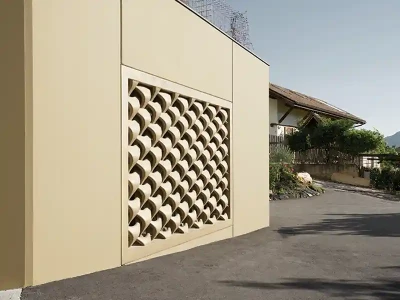
Commonly referred to as patterned concrete or imprinted concrete, Stamped concrete is concrete that is designed to resemble brick, slate, flagstone, stone, tile, wood and various other patterns and textures. Earlier only expensive commercial applications looked decent, now with the introduction of less expensive stamped concrete exteriors can also look impressive.
Seeing the burgeoning response to this texturizing and pigmenting trends, Bomanite India is bringing for the first time to India the concept of stamped and decorative concrete which is a well established concept in various parts of the world.

Process of creating a designer outdoor floor
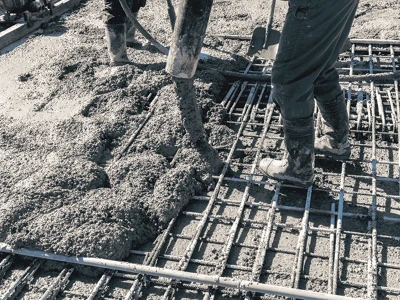
- Step 1. Wait for the bleed water to evaporate from the surface of the concrete. Then check the concrete to see if it’s firm enough by pressing your finger into the surface about 1/2". It’s all about timing here!
- Step 2. Broadcast the release agent over the surface, use a big paint brush or carefully throw it on with your hand. Completely cover the area where you are about to stamp, not too thick though. Wear protective clothes and a mask, this stuff goes everywhere!
- Step 3. Lay your first stamp on the concrete and lightly press it in with your hand for now. Make sure it is exactly where you want it, the first one is very important to have aligned in the proper position.
- Step 4. Lay your second stamp next to the first one, make sure they are snug or locked together. Continue laying all your stamping mats across the width of the slab. Pressing or tamping them into the surface of the slab with a hand tamper.
Don’t tamp too hard, just hard enough to leave the impression of the stamp. - Step 5. When you’ve laid out and tamped all the concrete stamps, lift the first one straight up. Be careful not to drag a corner or slide it in any way. Continue that process, leapfrogging them one by one until the entire slab has been stamped.
- Step 6. Early the next morning saw in the expansion joints to help prevent cracking.
- Step 7. Clean off the powdered release agent. You can broom off the majority of it and pick it up, then use a garden hose and rinse off the rest. Some will stick to the surface, that’s what creates a two tone colored effect. It will look great after you seal it.
- Step 8. Apply a concrete sealer after the surface is completely dry. It might be a good idea to wait 1 day after you rinse the stamped concrete to seal it. Moisture and concrete sealers don’t mix well together. That’s it you’ve learned how to stamp concrete.
Hiring a professional concrete stamping contractor is recommended. These steps don’t sound to hard but there are a lot of variables like wind, sun, a hot concrete mix, or half the slab is in the shade and the other half is in the hot sun, that can make stamping concrete very challenging.
With concrete you only get one chance to do it right, especially with stamping, you have a small window of opportunity to make something that looks really good vs something that doesn’t look good at all. Concrete stamping offers a number of advantages when compared to other materials like asphalt, natural stone, and precast pavers.

Benefits of Stamped Concrete

Stamped concrete can make a dramatic impression, and there are many reasons why home owners are choosing this authentic material to enhance their landscapes and buildings. Along with the known durability and long-lasting feature of regular concrete, stamping adds a decorative touch making it a desirable and economical product for all.
Some of the benefits are:
- Available in many colors and patterns, concrete stamping offers many design possibilities.
- Durable and long lasting, will last for decades when properly installed and maintained.
- Can be installed about twice as fast as natural stone or precast pavers.
- Can be customized with a one of a kind design of logo.
- No special maintenance requirements, just wash occasionally and reseal every few years.
- Better resistance to moisture and heavy traffic areas. Sustain a pressure of 600 PSI
- Good light reflectivity if lightly colored.

How to stamp and texture concrete
We usually color the concrete, pour the patio or driveway and wait until it is almost hard enough to walk on without sinking in more than a 1/4 to 3/8 of an inch.
Then we cover the surface with a powdered or liquid release agent this keeps the stamps from sticking to the surface. It also adds an antique effect to the final finish.
The next step is to press the rubber stamps into the surface of the concrete pull them up and the texture or pattern is left.
After it cures saw in the expansion joints and apply a good quality concrete sealer.
The end result can be a beautiful concrete slab that looks like slate, stone or even wood planks.
Stamped Concrete Sealers
There are two basic types of stamped sealers; one is a penetrating sealer the other is a film forming sealer.
Penetrating Sealers: A penetrating sealer does actually penetrate the surface and react chemically with the concrete to protect against moisture and deicing salts. It fills the micro and macro spaces, solidifying the entire substrate into one solid mass.
These prevent rain and moisture absorbtion, allowing water to bead up on the surface. The sealed surface is very easy to clean and stays cleaner longer. This has the lowest maintenance and reapplication costs of other sealers.
Penetrating sealers are UV resistant and most allow moisture vapor to escape the concrete.
Use a penetrating stamped concrete sealer for outside and inside stamped concrete where a matte finish is desired. If you don’t want a wet, shiny look this is the sealer to choose.
Film forming sealers: Film forming sealers do just what their name implies, they form a protective film over the surface of the concrete.
Film formers are the most popular choice for decorative stamped concrete because they enhance the colors in the concrete and leave a gloss or sheen looks to the concrete.
Acrylic film forming sealers are the easiest to apply. They can be used on interior or exterior stamped concrete.
Acrylic sealers provide good protection against water and chemical damage. They are UV resistant, non yellowing, fast drying, and come in high or low gloss levels. Acrylics offer a softer surface and are usually the least expansive.
Urethane film forming sealers go on about twice as thick as the acrylic sealer and provide excellent protection against chemicals and abrasives.
These are very good for high traffic areas, really enhance the beauty of decorative concrete, and can be used on both interior and exterior stamped concrete.
Epoxies will give you the hardest, longest lasting, chemical and abrasive resistant finish of all the stamped concrete sealers.
They bond very well to concrete and are generally used for interior applications. They are less UV resistant and may yellow if exposed to the sun. Epoxies are great sealers for high traffic areas and very easy to maintain.
Before installing any sealers to stamped concrete makes sure the surface is completely dry and clean from dirt, dust, oil, and grease.
Applying the sealer correctly will make clean up easier and offer very good resistance to harsh weather conditions, mold, and bacteria growth.
Cleaning and sealing concrete should be done on a regular basis. The frequency will depend on how high a traffic area to cars or foot traffic the concrete is exposed to.